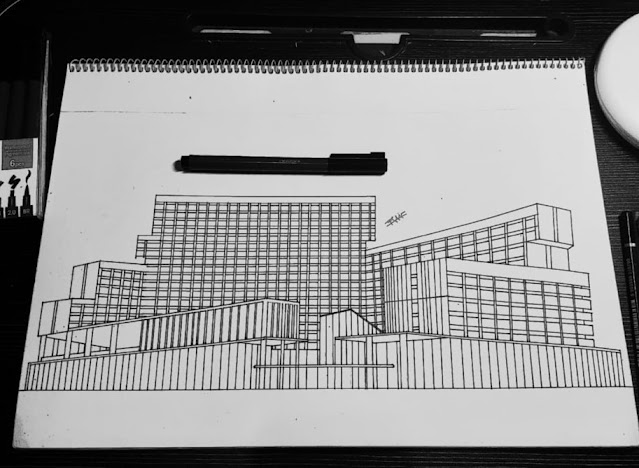
In this post, I will tell you the secret about how to measure a building easily, so the building looks more structured. If you have difficulty positioning parts of a building, this is the right post for you. After you read this post, I hope you can apply it to your sketch. Besides, you will see that architecture is not a complicated thing to scribble on a piece of paper. But before that, we will learn about what is measurements in building drawings.
What are Measurements in Building Drawings?
The process of measuring the height and width of a building's components is called measuring in building drawings. Typically, millimeters or centimeters are used to measure it. Making a sketch of a building requires computation for the sketch to be accurate and realistic. How do you take measurements in drawing buildings? We will learn how to measure a sketch of a building that has 959 units, Begawan Apartment.
 |
| Begawan Apartment, Malang |
Steps on How to Measure Begawan Apartment - Let's practice!
1. Distribution parts of the building
 |
| Picture 1 |
2. Part A
 |
| Picture 2 |
First floor: draw a slanted horizontal line. The left end is lower than the right end. So, the sketch will show near and far points in perspective. The distance between the right pole and the left pole is 15 cm, while the number of lines is 25. So, we have to divide 15 cm by 25, the result is 6 mm. So, the distance between each line is 6 mm.
.jpg) |
| Picture 3 |
Second floor: for the second floor, the first step is to determine the center point and divide it into two parts. The first part is for the open room on the left end, and the second part is for the room on the right end. The distance for the room at the far right is 8 cm, while the line for that room is 16, 8 divided by 16 is 0.5 cm. So, each line is 0.5 cm or 5 mm. For the open space at the left end, we can add 4 pillars.
3. Part B
 |
| Picture 4 |
Part B consists of two parts, the top and the bottom. For the bottom, draw lines 4 cm horizontally. For the top, draw lines 3 cm horizontally. In part B, there are 7 spaces horizontally. So, the width for 1 space is 0.6 cm or 6 mm. Meanwhile, vertically, there are 7 spaces. So, the height for 1 space is 0.4 cm or 4 mm.
4. Part C
 |
| Picture 5 |
Draw slanted horizontal lines. The right end is lower than the left end. So, the sketch will show near and far points in perspective. The distance between the right pole and the left pole is 13 cm. Divide into two parts. The number of lines is 13 lines. The right part is 5 cm for 6 lines, while the left part is 8 cm for 7 lines. This aims to make the sketch visible in perspective.
5. Part D
 |
| Picture 6 |
Draw lines in 9 cm. Because the number of spaces is 9 cm, then 1 space is 1 cm. The height is 4.5 cm, while the number of spaces from top to bottom is 5, so 1 space is 1 cm for 4 spaces, while 1 space is 0.5 cm. Add the front of the building and add details and vertical lines.
6. Part E
 |
| Picture 7 |
Draw lines in 12 cm. The left side is lower than the right side. Because the number of spaces from left to right is 12, then 1 space is 1 cm. The height is 5 cm, while the number of spaces from top to bottom is 8. So, 1 space is 0.6 cm or 6 mm.
7. Part F
 |
| Picture 8 |
.jpg) |
| Picture 9 |
Draw lines horizontally 15 cm with a height of 10 cm. The number of spaces horizontally is 22, so the distance between each space is 0.7 cm or 7 mm. The number of vertical spaces is 17, then each space is 0.6 cm or 6 mm.
Now, you've mastered how to measure a building on a sketch. You are ready to enhance your drawing skills. Don't forget to practice, because practice consistently will really help your progress in drawing skills.

Bagaimana cara membuatnya, rapii bangettt
ReplyDeleteWow😍Like the real
ReplyDeleteKarya yang luar biasa 👍
ReplyDeleteKarya terbaik
ReplyDeleteMasya Allah cantiknya
ReplyDeletePost a Comment