How to Draw Houghton Hall Building - Step by Step Guide
In this article, you will learn about how to make the basic sketch, how to measure and divide certain parts, and how to detail parts of the Houghton Hall building. But before that, we will learn about the history and architecture of Houghton Hall, because one of the best things about drawing buildings is that you get to learn historical facts about them.
History and Architecture of Houghton Hall
Houghton Hall is one of the largest buildings in Norfolk, UK that was built in the 1720s by Colen Campbell and James Gibbs, two well-known British architects. During Sir Robert Walpole's tenure as Britain's first prime minister, this building was constructed. By the 18th century, Walpole had grown this building to be Britain's largest museum that is dedicated to European art.
Walpole gave his friend, Thomas Ripley to lead the design. The first stone was laid on May 24, 1722. The brick warehouse was completed on December 7, 1722. The architect who had the biggest influence on this building's design was Colen Campbell. The building was created in the Wilton style by Colen Campbell. However, James Gibbs ultimately designed the tower's dome with the construction of the southwest tower in 1725, the southeast tower in 1727, and the other towers in 1729. The building's exterior and interior design, according to Walpole, cost more than £200,000 because of its opulent style. Apart from these two architects, William Kent created the ground floor and reception area's ceilings as well as some of the furniture.
Tools I used:
The following are some of the tools I used when drawing Houghton Hall:
- Paper size: A4 (21 x 29.7 cm)
- Pencil: 4H
- Drawing pens: Pigma micron 0.05, 0.1
- Rulers: straight ruler (42 cm, 30 cm, 15 cm, 10 cm) and shape ruler
- Compass
- Eraser
How to Draw It? Let's Get Started!
Step 1: Making a basic sketch
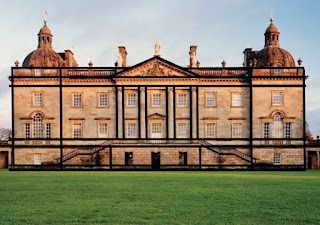 |
| Picture 1 |
For basic sketching, we can use a pencil first. The lines in picture 1 will help you to create basic lines.
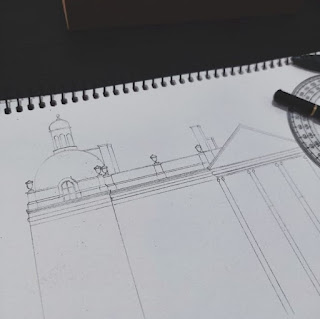.jpg) |
| Picture 2 |
Start the sketch from the center of the Houghton Hall building. Then, draw horizontal lines of the building. Divide the side into two parts (as in picture 2)
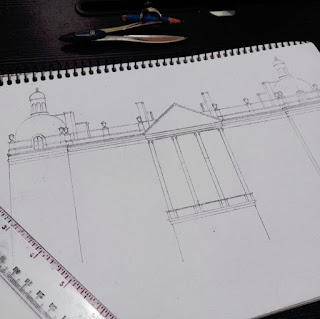.jpg) |
| Picture 3 |
Do the same thing for the sketch on the right side of the building (as in picture 3).
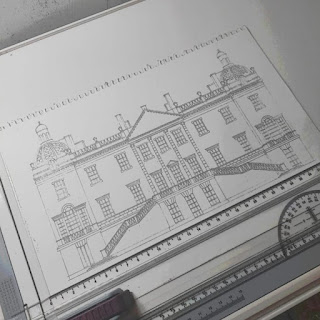 |
| Picture 4 |
Add windows in certain parts. Make sure that one window and another window are the same size.
How to measure it? For window placement, we can calculate in the following way: for example on the wall at the top of the stairs. The distance from the pillar to the edge of the wall is 6 cm, so we have to divide it to place the windows. Let's say the window size is 1 cm, then we need 2 cm for 2 windows, so there is still 4 cm. We can use 1 cm for the right side of the window, 1 cm for the left side of the window, and 2 cm for the middle side of the window. Do the same thing to measure the other windows. Don't forget to add stairs at the bottom of the building (as in picture 4).
Step 2: Making the basic sketch of the bricks
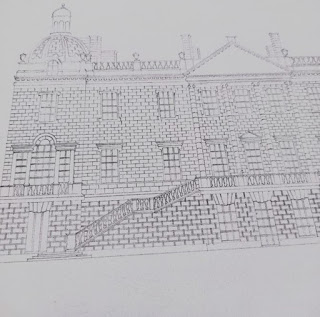 |
| Picture 5 |
Sketching the bricks starts from the top right side of the building. Draw horizontal lines on the right side of the building. Give vertical lines to the horizontal lines alternately (as in picture 5). Do the same thing for the middle and left sides of the building. For the bottom of the building, thicken the brick lines.
Step 3: Finishing lines and detailing
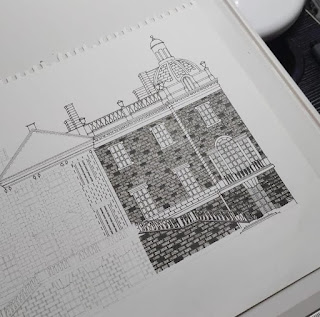 |
| Picture 6 |
The final lines and detailing start from the top right side of the building to reduce ink sticking to your hands and then making the paper dirty. Thick the basic sketch lines with drawing pens. A drawing pen with a size of 0.05 is for small and thin lines, while a drawing pen with a size of 0.01 is for large lines.
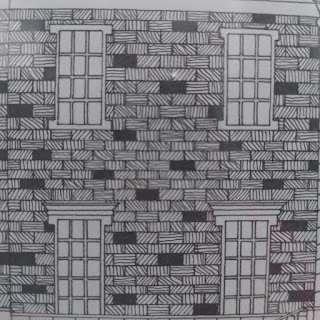 |
| Picture 7 |
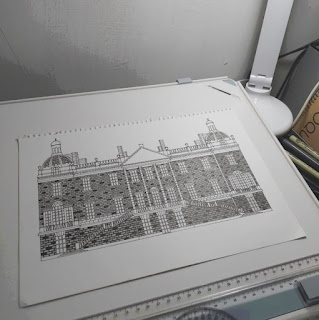 |
| Picture 8 |
Do the same thing for the middle and left sides of the building (as in picture 8).
Therefore, those are the steps about how to draw Houghton Hall. It's very easy, isn't it? Now, you can draw your version.


.jpg)


.jpg)
Such an amazing art work, go ahead Fini!
ReplyDeleteKeren banget karya nya😍 lanjut terus kak semangat💪🏻
ReplyDeleteKamu sangat berbakat 👍
ReplyDeleteKarya seni yang luar biasa, lanjutkan membuat karya-karya seni terbaiknyaa 😍
ReplyDeleteBest of the best, lanjutkan bakatmu.
ReplyDeleteAq suka sebab gambarnya cantik sekali .kembangkan bakatnya
ReplyDeletePost a Comment